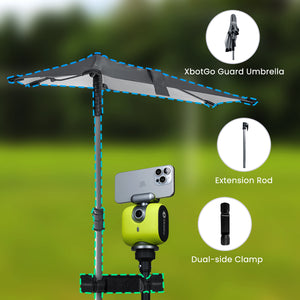
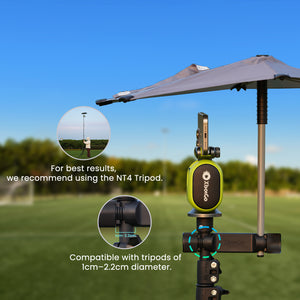
XbotGo Chameleon AI Sports Camera
Basketball Floater Tips: Learn, Practice & Score Easily
The floater might be basketball's most misunderstood shot. While flashy dunks grab headlines and three-pointers dominate analytics discussions, the humble floater quietly remains one of the most effective scoring weapons for players who know how to wield it.
Yet despite its proven effectiveness, many players struggle to develop this essential skill, leaving points on the table and limiting their offensive arsenal.
Understanding the Basketball Floater
A floater is a close-range, high-arcing shot typically executed by perimeter players when driving toward the basket. Unlike a traditional layup or jump shot, the floater is released with a soft touch before the shooter reaches the apex of their jump, creating a characteristic "floating" trajectory that gives the shot its name. The ball seems to hang in the air momentarily before dropping softly toward the rim.
The strategic importance of the floater lies in its ability to exploit a specific defensive vulnerability. When you've beaten your initial defender but face a help defender protecting the rim, you're caught in basketball's no-man's land—too close for a comfortable pull-up jumper, yet too far for a traditional layup. This is where the floater thrives, offering a solution that neutralizes both the trailing defender and the shot-blocker waiting at the rim.
Many players mistakenly believe floaters are low-percentage shots that should be avoided. This misconception often stems from coaches who view them skeptically, preferring traditional layups or jump shots. However, for specific player types—particularly smaller guards or aging players who've lost a step—the floater isn't just useful; it's essential. As one experienced player noted, floaters are shots that "age well" because they rely more on touch and timing than pure athleticism.
Mastering Floater Technique
The Foundation: Footwork Patterns
The key to a consistent floater begins with your feet. Unlike a traditional jump shot where you square up completely, the floater employs what basketball instructors call a "stride stop." For a right-handed floater, you'll use a right-left footwork pattern—the same sequence as a right-handed layup. This connection to familiar footwork helps with muscle memory and balance.
Your left foot (for right-handed shooters) should actually be slightly ahead of your right foot, distinguishing the floater stance from a typical shooting position. This positioning serves two purposes: it maintains better balance during the quick release, and it helps shield the ball from trailing defenders.
Body Positioning and Momentum Control
One of the biggest challenges in executing floaters is managing your forward momentum. While you need enough speed to beat your initial defender, too much momentum will carry you into the help defender or cause you to lose control of the shot. The solution is a near-vertical jump that redirects your energy upward rather than forward.
As you approach your launching point—typically around the free-throw line or just inside—decelerate slightly while maintaining your dribble. This controlled approach allows you to gather the ball smoothly and elevate straight up, maximizing the space between you and the rotating defender.
Release Mechanics: The "High-Five" Technique
Perhaps the most distinctive aspect of the floater is its unique release. Unlike a jump shot that requires full follow-through with wrist snap, the floater uses what many coaches call the "high-five" technique. Imagine giving someone a high-five above your head—that's the hand position and motion you want.
Release the ball at the highest point of your reach, with your palm facing up and minimal wrist action. This creates the soft, high-arcing trajectory that makes floaters so difficult to block. The ball should float off your fingertips with just enough rotation to maintain stability but not the aggressive backspin of a typical jump shot.
Common Technical Mistakes to Avoid
The most frequent error players make is over-rotating their wrist, treating the floater like a miniature jump shot. This creates too much velocity and backspin, often resulting in shots that hit hard off the back rim. Remember: less is more with floater mechanics.
Another common mistake is jumping forward rather than vertically. This reduces the space you've created from the help defender and increases the likelihood of charging fouls. Focus on going up, not out, even if it feels unnatural at first.
Advanced Floater Applications
Situational Usage Based on Court Position
Not all floaters are created equal. Your approach should vary based on where you're attacking from:
Top of the Key: When driving straight on, you have the option of a direct floater or using the backboard. The glass can be your friend here, offering a larger margin for error.
Wing Attacks: Coming from the wing at a 45-degree angle, you'll need to account for the different visual perspective. Practice these angles specifically, as the rim appearance changes significantly.
Baseline Drives: These require the highest arc and most delicate touch, as you're shooting across the rim without backboard assistance. Only attempt these when you've mastered the fundamentals.
One-Foot vs. Two-Foot Variations
While traditional teaching emphasizes two-foot floaters for balance, game situations often demand one-foot execution. The one-foot floater, sometimes called a "runner," allows for quicker release when defenders close fast. Practice both variations, but understand their different applications:
- Two-foot floaters: Better balance, more consistent, ideal when you have time
- One-foot floaters: Quicker release, better for full-speed attacks, harder to master
Integration with Other Offensive Moves
The floater becomes truly dangerous when integrated into your overall offensive package. Use it as part of a chess match with defenders:
- Attack hard for a layup to establish the threat
- Next possession, float it over the help defense
- When defenders start sitting back, hit the pull-up jumper
- Once they're guessing, create for teammates
This strategic variation keeps defenders off-balance and opens up opportunities for both you and your teammates.
Practice Methods That Work
Progressive Training Approach
Start your floater development slowly—literally. Begin with stationary floaters, focusing solely on the release mechanics without worrying about footwork or defense. Once comfortable, add movement:
- Walk-through floaters: Slow approach, focus on footwork
- Half-speed drives: Add moderate pace while maintaining form
- Game-speed attacks: Full-speed execution with proper technique
- Contested floaters: Add defensive pressure gradually
This progression builds muscle memory while maintaining proper form throughout.
Essential Practice Drills
The Elbow Series: Start at each elbow, take one dribble, and execute your floater. Alternate between left and right elbow, working both hands. Complete 10 makes from each side before moving on.
Free Throw Line Touches: Dribble from half-court, touch the free-throw line with your foot, and immediately go into your floater. This simulates the common launching point while building spatial awareness.
Angle Variation Drill: Set up five cones in an arc from baseline to baseline, all at floater range. Make two floaters from each spot, focusing on how the angle affects your approach and release.
Measuring Improvement
Track your floater development systematically. Keep a simple log recording:
- Daily makes/attempts from different spots
- Comfort level with each hand (1-10 scale)
- Success rate in pickup games or scrimmages
Many players report starting around 30% accuracy and improving to 60-70% with dedicated practice. The key is consistency—100 floaters per day for a month will transform your touch.
Overcoming Common Challenges
Building Consistency Under Pressure
The biggest frustration players express is the gap between practice success and game execution. The floater's "formless" nature makes it harder to replicate under pressure than a standard jump shot. Combat this by:
- Practicing with defensive pressure whenever possible
- Visualizing game scenarios during solo work
- Starting with uncontested game attempts before trying in traffic
- Building confidence through high-volume repetition
Developing Both Hands
While you'll naturally favor your dominant hand, developing an ambidextrous floater game exponentially increases your effectiveness. Defenders can't force you to your weak side if both sides are strong. Dedicate extra time to your off-hand, accepting that it will feel awkward initially.
Adapting to Different Defensive Schemes
Modern defenses employ various strategies to combat floaters. Against drop coverage, you'll have more space and time. Against aggressive hedging, you might need quicker releases. Study how defenses play you and adjust accordingly. The beauty of the floater is its adaptability—master the fundamentals, and you can modify based on what the defense gives you.
The Path to Floater Mastery
Mastering the floater isn’t about following one fixed technique, but developing touch and adaptability through consistent practice. Start with proper footwork, vertical movement, and a soft high-five release, progressing from basic drills to game-speed shots.
Regardless of your size or experience, the floater can become a vital tool against tough defenses. With dedication and patience, what starts as a difficult skill can soon turn into one of your most effective scoring weapons—just like it did for every great floater scorer in the game.
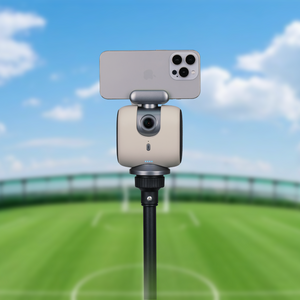
XbotGo Chameleon AI Sports Camera
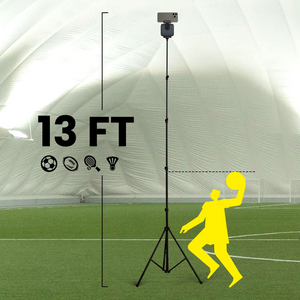
Capture every moment with AI-powered tracking. Perfect for coaches, parents, and athletes who want seamless footage without manual filming.


 Soccer
 Basketball
 Ice Hockey
 Football


