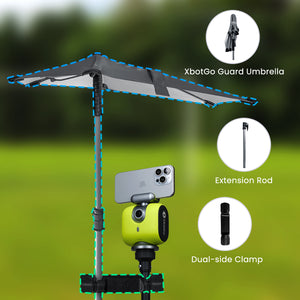
XbotGo Falcon

Consejos para el tiro flotante de baloncesto: aprende, practica y anota fácilmente
La flotadora podría ser el tiro más incomprendido del baloncesto. Mientras que las volcadas espectaculares acaparan titulares y los triples dominan las discusiones analíticas, la humilde flotadora sigue siendo, discretamente, una de las armas anotadoras más efectivas para los jugadores que saben cómo usarla.
Sin embargo, a pesar de su eficacia demostrada, muchos jugadores tienen dificultades para desarrollar esta habilidad esencial, dejando puntos en la mesa y limitando su arsenal ofensivo.
Entendiendo el flotador de baloncesto
Una flotadora es un tiro corto y de gran arco que suelen ejecutar los jugadores de perímetro al penetrar hacia la canasta. A diferencia de una bandeja tradicional o un tiro en suspensión, la flotadora se lanza con un toque suave antes de que el tirador alcance el punto máximo del salto, creando una trayectoria flotante característica que le da nombre. El balón parece flotar en el aire un momento antes de caer suavemente hacia el aro.
La importancia estratégica de la flotadora reside en su capacidad para explotar una vulnerabilidad defensiva específica. Cuando has superado a tu defensor inicial, pero te enfrentas a un defensor de apoyo que protege el aro, te encuentras en tierra de nadie en el baloncesto: demasiado cerca para un tiro en suspensión cómodo, pero demasiado lejos para una bandeja tradicional. Aquí es donde la flotadora prospera, ofreciendo una solución que neutraliza tanto al defensor que va detrás como al bloqueador que espera en el aro.
Muchos jugadores creen erróneamente que las flotadoras son tiros de bajo porcentaje que deben evitarse. Esta idea errónea suele deberse a que los entrenadores las ven con escepticismo y prefieren las bandejas tradicionales o los tiros en suspensión. Sin embargo, para ciertos tipos de jugadores —en particular, bases más pequeños o jugadores de edad avanzada que han perdido ritmo— la flotadora no solo es útil, sino esencial. Como señaló un jugador experimentado , las flotadoras son tiros que "envejecen bien" porque dependen más del toque y la sincronización que del atletismo puro.
Dominando la técnica del flotador
La Fundación: Patrones de trabajo de pies
La clave para un tiro flotante consistente empieza con los pies. A diferencia de un tiro en suspensión tradicional, donde te colocas completamente en posición vertical, el tiro flotante emplea lo que los instructores de baloncesto llaman una "parada de zancada". Para un tiro flotante diestro, se utiliza un patrón de juego de pies derecho-izquierdo, la misma secuencia que una bandeja derecha. Esta conexión con el juego de pies habitual ayuda a la memoria muscular y al equilibrio.
El pie izquierdo (para tiradores diestros) debe estar ligeramente por delante del derecho, lo que distingue la postura de flotador de una posición de tiro típica. Esta posición tiene dos propósitos: mantiene un mejor equilibrio durante el lanzamiento rápido y ayuda a proteger el balón de los defensores que se quedan atrás.
Posicionamiento corporal y control del impulso
Uno de los mayores desafíos al ejecutar flotadores es controlar el impulso hacia adelante. Si bien necesitas suficiente velocidad para superar a tu defensor inicial, un impulso excesivo te llevará hacia el defensor de apoyo o hará que pierdas el control del tiro. La solución es un salto casi vertical que redirija tu energía hacia arriba en lugar de hacia adelante.
Al acercarse a su punto de lanzamiento (normalmente cerca de la línea de tiros libres o justo dentro), desacelere ligeramente mientras mantiene el drible. Este enfoque controlado le permite recoger el balón con suavidad y elevarse en línea recta, maximizando el espacio entre usted y el defensor que gira.
Mecánica de liberación: La técnica del "Choca esos cinco"
Quizás el aspecto más distintivo del tiro flotante es su singular lanzamiento. A diferencia de un tiro en suspensión, que requiere un seguimiento completo con un movimiento de muñeca, el tiro flotante utiliza lo que muchos entrenadores llaman la técnica del "choca esos cinco". Imagina chocar los cinco con alguien por encima de tu cabeza: esa es la posición y el movimiento de la mano que buscas.
Suelte el balón lo más alto posible, con la palma hacia arriba y la mínima acción de la muñeca. Esto crea la trayectoria suave y de gran arco que dificulta tanto el bloqueo de los flotadores. El balón debe flotar en las yemas de los dedos con la rotación justa para mantener la estabilidad, pero sin el agresivo efecto de retroceso de un tiro en suspensión típico.
Errores técnicos comunes que se deben evitar
El error más frecuente que cometen los jugadores es girar demasiado la muñeca, tratando la flotadora como un tiro en suspensión en miniatura. Esto genera demasiada velocidad y efecto de retroceso, lo que a menudo resulta en tiros que impactan con fuerza en el aro trasero. Recuerda: menos es más con la mecánica de la flotadora.
Otro error común es saltar hacia adelante en lugar de verticalmente. Esto reduce el espacio que has creado con respecto al defensor de apoyo y aumenta la probabilidad de que te cometan faltas. Concéntrate en subir, no en salir, aunque al principio te parezca poco natural.
Aplicaciones flotantes avanzadas
Uso situacional basado en la posición en la corte
No todos los flotadores son iguales. Tu estrategia debe variar según el punto de ataque:
Parte superior de la llave: Al conducir en línea recta, puede optar por un flotador directo o usar el tablero trasero. El cristal puede ser su aliado, ofreciendo un mayor margen de error.
Ataques de ala: Al partir desde la ala en un ángulo de 45 grados, deberá tener en cuenta la diferente perspectiva visual. Practique estos ángulos específicamente, ya que la apariencia del aro cambia significativamente.
Golpes de fondo: Requieren el arco más alto y un toque muy delicado, ya que se disparan por el aro sin ayuda del tablero. Inténtalos solo cuando domines los fundamentos.
Variaciones de un pie vs. dos pies
Si bien la enseñanza tradicional enfatiza los tiros flotantes con ambos pies para mantener el equilibrio, las situaciones de juego a menudo exigen la ejecución con un pie. El tiro flotante con un pie, a veces llamado "corredor", permite una liberación más rápida cuando los defensores se acercan rápidamente. Practique ambas variantes, pero comprenda sus diferentes aplicaciones:
- Flotadores de dos pies: Mejor equilibrio, más consistente, ideal cuando tienes tiempo.
- Flotadores de un pie: liberación más rápida, mejor para ataques a toda velocidad, más difícil de dominar
Integración con otros movimientos ofensivos
El flotador se vuelve realmente peligroso al integrarlo en tu paquete ofensivo general. Úsalo como parte de una partida de ajedrez con los defensores:
- Ataque fuerte para lograr una bandeja y establecer la amenaza.
- En la siguiente posesión, hazla flotar sobre la defensa de ayuda.
- Cuando los defensores comiencen a retroceder, realiza el tiro en suspensión.
- Una vez que estén adivinando, crea para los compañeros de equipo.
Esta variación estratégica mantiene a los defensores desequilibrados y abre oportunidades tanto para ti como para tus compañeros de equipo.
Métodos de práctica que funcionan
Enfoque de entrenamiento progresivo
Comienza a desarrollar tus flotadores lentamente, literalmente. Empieza con flotadores estacionarios, concentrándote únicamente en la mecánica de liberación sin preocuparte por el juego de pies ni la defensa. Una vez que te sientas cómodo, añade movimiento:
- Flotadores de paso: aproximación lenta, enfoque en el juego de pies
- Impulsos a media velocidad: añade un ritmo moderado manteniendo la forma
- Ataques a la velocidad del juego: Ejecución a toda velocidad con la técnica adecuada.
- Flotadores disputados: agregue presión defensiva gradualmente
Esta progresión desarrolla la memoria muscular al tiempo que mantiene la forma adecuada en todo momento.
Ejercicios de práctica esenciales
Serie de Codos: Comienza con cada codo, realiza un bote y ejecuta la flotación. Alterna entre el codo izquierdo y el derecho, trabajando con ambas manos. Completa 10 repeticiones de cada lado antes de continuar.
Toques en la línea de tiros libres: Driblar desde media cancha, tocar la línea de tiros libres con el pie e inmediatamente lanzar. Esto simula el punto de lanzamiento habitual y desarrolla la percepción espacial.
Ejercicio de variación de ángulo: Coloque cinco conos en un arco de línea de base a línea de base, todos a distancia de flotación. Haga dos flotaciones desde cada punto, concentrándose en cómo el ángulo afecta su aproximación y liberación.
Medición de la mejora
Monitorea sistemáticamente el desarrollo de tus flotadores. Lleva un registro sencillo:
- Realizaciones/intentos diarios desde diferentes lugares
- Nivel de comodidad con cada mano (escala del 1 al 10)
- Tasa de éxito en partidos de práctica o de entrenamiento
Muchos jugadores informan que empiezan con una precisión del 30 % y mejoran hasta el 60-70 % con práctica constante. La clave es la constancia: 100 flotadas al día durante un mes transformarán tu toque.
Superar desafíos comunes
Construyendo consistencia bajo presión
La mayor frustración que expresan los jugadores es la diferencia entre el éxito en la práctica y la ejecución del juego. La naturaleza "amorfo" del tiro flotante dificulta su reproducción bajo presión en comparación con un tiro en suspensión estándar. Combate esto con:
- Practicar con presión defensiva siempre que sea posible
- Visualización de escenarios de juego durante el trabajo en solitario
- Comenzando con intentos de juego sin oposición antes de intentarlo en el tráfico.
- Desarrollar la confianza mediante la repetición de alto volumen
Desarrollando ambas manos
Aunque naturalmente favorecerás tu mano dominante, desarrollar un juego de flotadores ambidiestros aumenta exponencialmente tu efectividad. Los defensores no pueden obligarte a jugar por tu lado débil si ambos lados son fuertes. Dedica más tiempo a tu mano torpe, aceptando que al principio te resultará incómodo.
Adaptación a diferentes esquemas defensivos
Las defensas modernas emplean diversas estrategias para combatir las flotadoras. Contra la cobertura de caída, tendrás más espacio y tiempo. Contra la cobertura agresiva, podrías necesitar lanzamientos más rápidos. Estudia cómo te juegan las defensas y adáptate a ellas. La ventaja de la flotadora reside en su adaptabilidad: domina los fundamentos y podrás modificarla según lo que te ofrezca la defensa.
El camino hacia el dominio de los flotadores
Dominar el tiro flotante no se trata de seguir una técnica fija, sino de desarrollar el toque y la adaptabilidad mediante la práctica constante. Comienza con un juego de pies adecuado, movimiento vertical y un suave lanzamiento de cinco, progresando desde ejercicios básicos hasta tiros con velocidad de juego.
Independientemente de tu tamaño o experiencia, la flotadora puede convertirse en una herramienta vital contra defensas sólidas. Con dedicación y paciencia, lo que empieza como una habilidad difícil puede convertirse pronto en una de tus armas goleadoras más efectivas, como sucedió con todos los grandes anotadores de flotadoras del béisbol.