Γ
Skip to content
Open menu
Products
Falcon
Chameleon
Accessories
NT1 Tripod
NT4 Tripod
NT4 Pro
Umbrella
Chameleon Case
Remote Control
Sports
& Users
Sports
Soccer
Basketball
Ice Hockey
Lacrosse
Football
Handball
Users
Parents
Coaches
Clubs
Players
Sports
Soccer
Basketball
Ice Hockey
Lacrosse
Football
Handball
Users
Parents
Coaches
Clubs
Players
Explore
Blog
Community
About Us
Dream to Goal
Help Center
User Guide
Customer Service
Search
Cart
Account
Currency
Australia (AUD $)
Austria (EUR €)
Bahrain (USD $)
Belgium (EUR €)
Bulgaria (EUR €)
Canada (CAD $)
Croatia (EUR €)
Cyprus (EUR €)
Czechia (CZK Kč)
Denmark (DKK kr.)
Estonia (EUR €)
Finland (EUR €)
France (EUR €)
Germany (EUR €)
Greece (EUR €)
Hong Kong SAR (HKD $)
Hungary (HUF Ft)
Ireland (EUR €)
Israel (ILS ₪)
Italy (EUR €)
Kuwait (USD $)
Latvia (EUR €)
Lithuania (EUR €)
Luxembourg (EUR €)
Macao SAR (MOP P)
Malaysia (MYR RM)
Malta (EUR €)
Netherlands (EUR €)
New Zealand (AUD $)
Norway (USD $)
Oman (USD $)
Philippines (PHP ₱)
Poland (PLN zł)
Portugal (EUR €)
Qatar (QAR ر.ق)
Romania (RON Lei)
Saudi Arabia (SAR ر.س)
Singapore (SGD $)
Slovakia (EUR €)
Slovenia (EUR €)
South Korea (KRW ₩)
Spain (EUR €)
Sweden (SEK kr)
Switzerland (CHF CHF)
Taiwan (TWD $)
Türkiye (USD $)
United Arab Emirates (AED د.إ)
United Kingdom (GBP £)
United States (USD $)
Language
English
Français
Español
Italiano
Deutsch
Português (portugal)
Close
knowledge
Filter by
Filter by
Basketball
Football
Ice Hockey
Lacrosse
Pickleball
Soccer
Share
The 10 Most Memorable World Cup Moments of All Time
The 2026 FIFA World Cup kicks off in North America on June 11. FIFA projects that nearly 6 billion people w...
When Is the World Cup 2026? Everything You Need to Know
The 2026 FIFA World Cup runs from June 11 to July 19, 2026. That’s 39 days, 104 matches, 48 teams, and 16 c...
15 Highest Paid Volleyball Players in 2026: The Complete List
Here’s something most sports fans don’t expect: the two highest paid volleyball players in the world are bo...
25 Volleyball Facts That Will Change How You See the Game
Volleyball looks straightforward. Two teams, one net, keep the ball off the floor. But behind that simplici...
Volleyball Terms: 50+ Essential Words You Needs to Know
Volleyball is one of the fastest-growing sports in the world — over 800 million people play it globally, an...
Volleyball Drills for Beginners: 10 Drills That Actually Build Skills
Most volleyball drills for beginners fail for the same reason. They focus on repetition without context. A ...
Positions in Volleyball: Which One Is Hardest, and How to Find Your Fit
Volleyball is the top girls’ team sport in U.S. high schools, with over 470,000 participants each season. W...
Average Volleyball Player Height: A Full Breakdown by Position and Level
The average volleyball player height across the USA men’s and women’s national teams is 6’3” (191 cm). Men ...
13 Best Women’s Volleyball Players of All Time
The debate over the best women volleyball players never settles cleanly. Do you rank by Olympic medals? Pea...
15 Best Male Volleyball Players of All Time, Ranked
The best volleyball player of all time is harder to crown than in almost any other sport. Unlike basketball...
13 Tallest Male Volleyball Players of All Time (Ranked by Height)
The men’s volleyball net sits at 243 cm — just under 8 feet. Most professional players still need a serious...
15 Tallest Female Volleyball Players in the World (2026)
The average elite female volleyball player stands around 183 cm (6 feet). That’s already well above the gen...
« Previous
·
1
2
3
4
…
14
·
Next »
knowledge
Filter by
Filter by
Basketball
Football
Ice Hockey
Lacrosse
Pickleball
Soccer
Share
How Many Substitutions Can Be Made in Soccer?
In professional soccer, each team gets 5 substitutions per match. But here’s the part most f...
Goalkeepers Who Scored Goals: History’s Greatest Moments
In January 2026, Benfica goalkeeper Anatoliy Trubin stepped up for a free kick deep in stopp...
What to Eat Before a Soccer Game (And When to Eat It)
Most players know carbs matter before a soccer game. What they get wrong is the timing. The ...
How Long Does a Soccer Match Last? A Complete Guide
You’ve just learned your kid made the soccer team, or you’re planning to watch your first li...
How Many Soccer Divisions Are There in Spain? (All 10 Levels Explained)
Spain has five national soccer divisions, plus up to five more regional tiers below that. Al...
The History of the FIFA World Cup: How It Became a Global Event
FIFA World Cup history begins with a bold idea and a long boat ride. In 1930, just 13 nation...
« Previous
·
1
2
3
4
…
28
·
Next »
Your cart
Close
You may like
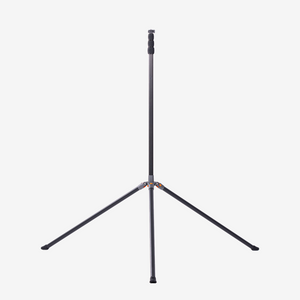
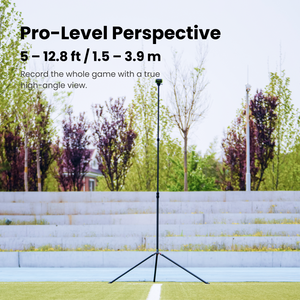
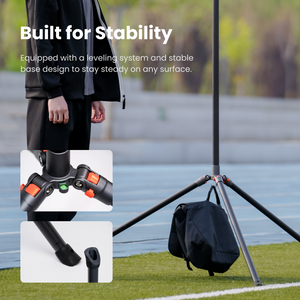
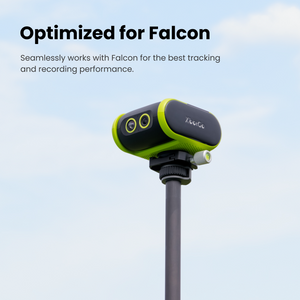
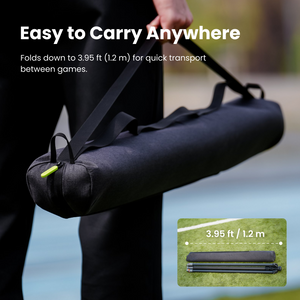
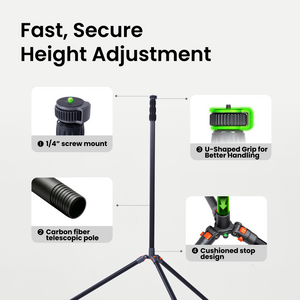
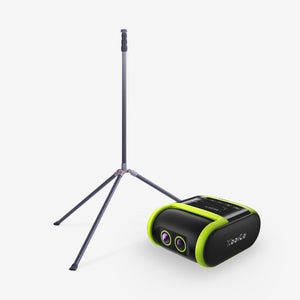
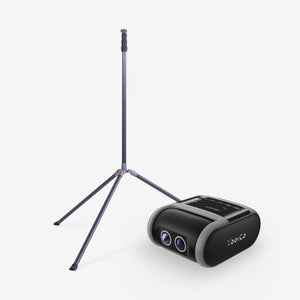
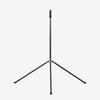
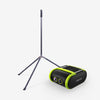
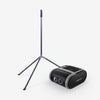
XbotGo NT4 PRO Carbon Fiber Tripod – 12.8ft
From
$249.99 USD
Shop
NT4 Pro Only
Falcon Green + NT4 Pro
Falcon Grey + NT4 Pro
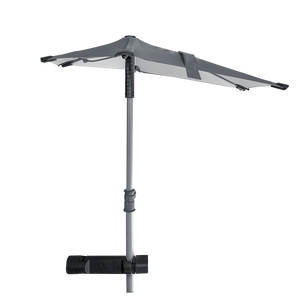
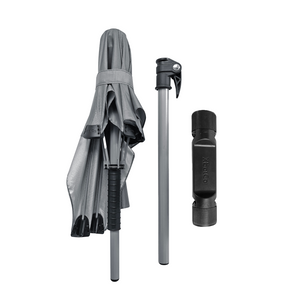
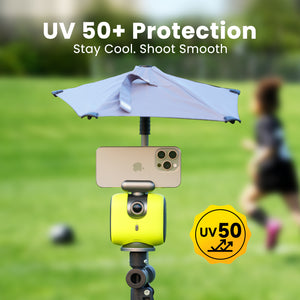
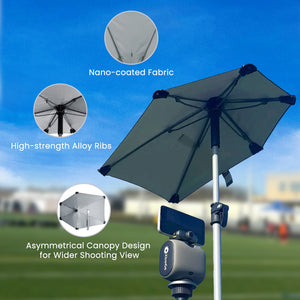
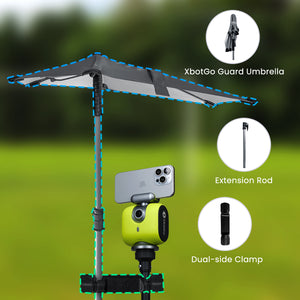
XbotGo Weather Guard Umbrella
$49.99 USD
Shop
Your cart
Close
Your Cart is Ready!
Shop Now